Tired of store-bought bread that falls flat in flavor? Want a crust that crackles and a crumb that feels like magic? You are not alone. Sourdough holds something special—a rhythm, a reward, a rich character no factory loaf can match.
You do not need a fancy kitchen or a secret family recipe. You only need flour, water, salt, and patience. That slow rise does something no shortcut can replace. It builds flavor, texture, and a deep sense of pride when you slice into your very own loaf.
You will find no confusion here. Every step will be clear. You will know exactly what to do, how long it takes, and what to expect at each stage. Whether you are brand new to sourdough or trying to level up, you are in the right place.
Grab your bowl, flour your hands, and let us bring that sourdough starter to life. The oven is waiting. Your kitchen is about to smell amazing.
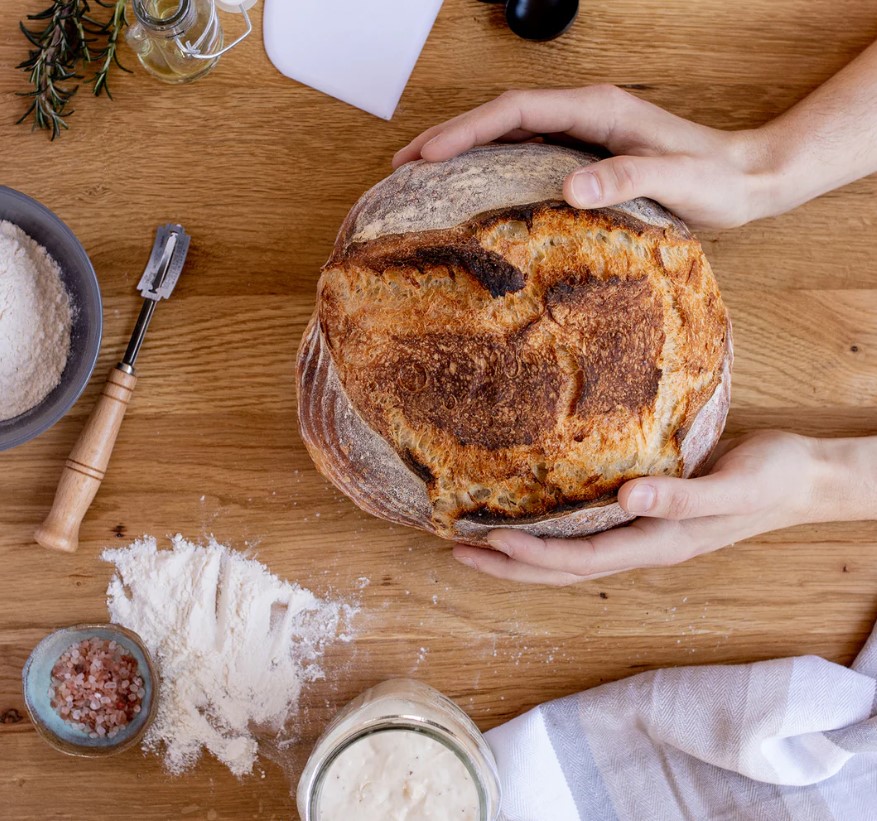
Homemade Artisan Sourdough Bread
Equipment
- Mixing bowl
- Kitchen scale (recommended for accuracy)
- Dutch oven or cast iron pot with lid
- Bench scraper or spatula
- Proofing basket or bowl lined with a kitchen towel
- Sharp knife or lame (for scoring)
- Plastic wrap or clean cloth
Ingredients
- 500 g about 4 cups bread flour
- 375 g 1 ½ cups + 1 tbsp water, room temperature
- 100 g active sourdough starter fed within 4–6 hours prior
- 10 g 1 ½ tsp sea salt
- Extra flour for dusting
Instructions
- Feed Your Starter:Make sure your sourdough starter is bubbly and active. Feed it 4–6 hours before you begin.

- Mix Dough (Autolyse Stage):Combine flour and water in a large bowl. Mix until no dry flour remains. Cover and let rest for 1 hour.

- Add Starter and Salt:Add the active starter and salt. Use your hands to pinch and fold until well combined.

- Bulk Fermentation (4–6 hours):Cover the dough and leave it at room temperature. For the first 2 hours, perform stretch and folds every 30 minutes—stretch one side up and fold it over, repeating on all four sides.

- Shape the Dough:Once fermentation is done, gently turn the dough onto a floured surface. Shape into a round by tucking the edges underneath to build tension.

- Final Proof (Overnight):Place the shaped dough in a floured proofing basket or towel-lined bowl. Cover and refrigerate for 8–12 hours.

- Preheat Oven:Place your Dutch oven inside and preheat the oven to 475°F (245°C) at least 30 minutes before baking.

- Score and Bake:Remove dough from fridge, turn onto parchment paper, and score the top with a sharp blade. Transfer into the hot Dutch oven.

- Baking:Bake covered for 20 minutes, then uncover and continue baking for 20–25 minutes until deep golden and crisp.

- Cool:Let the bread cool completely on a wire rack before slicing to let the interior set.

Video
Notes
- Hydration: This dough is 75% hydration, so slightly sticky. Beginners may reduce water to 350g.
- Flour Tip: Bread flour gives better structure. A mix with 10% whole wheat adds flavor.
- Watch the Proof: Dough that flattens too much might be over-proofed—shorten rise time if needed.
- Crust Tip: Steam is key! Covered baking helps form a crisp, blistered crust.
- Scoring Matters: It directs oven spring—cut decisively for best results.
How Cold Fermentation Changes Flavor and Texture?
Cold fermentation does more than slow things down. It changes everything about the final loaf. Longer, cooler fermentation boosts acidity and gives your sourdough a deeper, richer tang. That sharp edge comes from the balance between lactic and acetic acids. Warmer temps favor mild, yogurt-like notes. Cold temps bring out that sharper, complex bite.
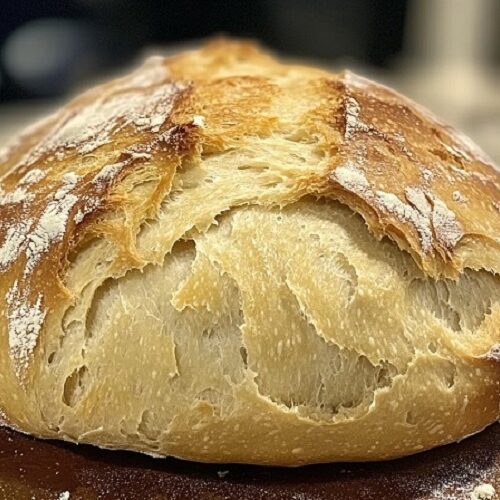
Texture also shifts. A cold final proof strengthens gluten strands without overdeveloping them. That helps the dough hold its shape. You get a loaf with a crisp crust and an open crumb that feels light but chewy. Room temperature proofing often gives you larger air pockets near the top. A cold proof spreads them evenly.
Always preheat your Dutch oven thoroughly before baking. That contrast between cold dough and hot surface helps lift the loaf and set the crust fast. You get better oven spring, which helps with both rise and texture.
Why Coil Folds Work Better Than Kneading for Open Crumb?
Open crumb does not come from hard work. It comes from smart handling. Traditional kneading tears gluten networks. That makes the dough tight. Coil folds stretch and build strength without deflating or tearing anything. You lift the dough, stretch it gently, and fold it under itself. Over time, it gains structure without losing air.
Every fold traps more gas and encourages fermentation. Coil folds also reduce oxidation. That means better flavor and better color in the crust. No need to use force. Let time and tension do the work.
You only need two to four sets of coil folds during bulk fermentation. Space them about 30 to 45 minutes apart. If your dough starts to hold its shape and feels tight after stretching, stop folding. You reached the right structure.
What Your Dough Temperature Tells You (And Why It Matters More Than Time)?
Time means nothing without temperature. Dough temperature controls fermentation speed. A dough at 78°F behaves very differently than one at 72°F. Just a few degrees shift the timeline by hours. That affects structure, rise, and final flavor.
Use an instant-read thermometer. Measure your dough right after mixing. That number helps you decide what your next steps should be. Cooler dough needs more folds and more fermentation time. Warmer dough needs shorter intervals and closer monitoring.
Do not rely on the clock. Always check how the dough feels. A well-fermented dough will jiggle slightly, feel soft but elastic, and show signs of bubbles near the surface. Temperature tells you how fast you are moving toward that point.
Aim for a dough temp of 76°F to 78°F after mixing. Adjust your water temperature to hit that range. Small shifts in temp lead to major changes in outcome.
Final Thoughts
Sourdough rewards attention. Every choice leaves a mark on the final loaf. You control each variable. That control gives you results no store-bought bread can match.
No fancy tricks. No shortcuts. Just simple ingredients, handled with care. You do not need to chase complexity. A crisp crust and a light, flavorful crumb come from good timing, smart shaping, and patience.
Your first loaf will teach you something. Your second will go smoother. Your third may surprise you. Every bake adds skill. Every result builds confidence.